{"id":7568084762707,"title":"Bridgestone Battlax T33","handle":"bridgestone-battlax-t33","description":"\u003cdiv id=\"top-bit\"\u003e\n\u003cdiv class=\"overview-txt\"\u003e\n\u003ch2\u003eBattlax T33\u003c\/h2\u003e\n\u003cdiv style=\"text-align: left;\" class=\"txt\"\u003e\n\u003cp\u003e\u003cspan\u003eThe Battlax Sport Touring T33 is Bridgestone’s premium sport touring tyre crafted to deliver effortless performance and extended tread life for when you never want the road to end. As the next evolution of the Battlax Sport Touring T32, the T33 is engineered with responsive handling and enhanced wet and dry grip, inspiring confidence through every curve, rain or shine, so you can enjoy the journey ahead.\u003c\/span\u003e\u003c\/p\u003e\n\u003cul\u003e\n\u003cli\u003e\u003cspan\u003eDelivers up to 47% longer wear life for more ride time.\u003c\/span\u003e\u003c\/li\u003e\n\u003cli\u003e\u003cspan\u003eEnhanced compound technology delivers impressive grip on wet roads.\u003c\/span\u003e\u003c\/li\u003e\n\u003cli\u003e\u003cspan\u003eNew pattern design to combat wear degradation.\u003c\/span\u003e\u003c\/li\u003e\n\u003cli\u003e\u003cspan\u003eOptimized pattern stiffness supports precise handling, straight-line stability and improved wear.\u003c\/span\u003e\u003c\/li\u003e\n\u003c\/ul\u003e\n\u003c\/div\u003e\n\u003c\/div\u003e\n\u003cul\u003e\u003c\/ul\u003e\n\u003cul\u003e\u003c\/ul\u003e\n\u003c\/div\u003e\n\u003cdiv class=\"clear-block\"\u003e\n\u003cdiv id=\"node-3299\" class=\"tyre node\"\u003e\n\u003cdiv class=\"node-content clear-block\"\u003e\n\u003ctable width=\"100%\"\u003e\n\u003ctbody\u003e\n\u003ctr style=\"height: 21px;\"\u003e\n\u003ctd style=\"width: 164px; height: 21px;\"\u003eTYRE\u003c\/td\u003e\n\u003ctd style=\"width: 416px; height: 21px;\"\u003eSIZE\u003c\/td\u003e\n\u003c\/tr\u003e\n\u003ctr style=\"height: 21px;\"\u003e\n\u003ctd style=\"width: 164px; height: 21px;\"\u003e\u003cspan\u003eFRONT\u003c\/span\u003e\u003c\/td\u003e\n\u003ctd style=\"width: 416px; height: 21px;\"\u003e120\/70 ZR17 (58W)\u003c\/td\u003e\n\u003c\/tr\u003e\n\u003ctr style=\"height: 21px;\"\u003e\n\u003ctd style=\"width: 164px; height: 21px;\"\u003e\u003c\/td\u003e\n\u003ctd style=\"width: 416px; height: 21px;\"\u003e120\/70 ZR18 (59W) (available June 2025)\u003c\/td\u003e\n\u003c\/tr\u003e\n\u003ctr style=\"height: 21px;\"\u003e\n\u003ctd style=\"width: 164px; height: 21px;\"\u003e\u003c\/td\u003e\n\u003ctd style=\"width: 416px; height: 21px;\"\u003e110\/80 VR19 (59V) (available May 2025)\u003c\/td\u003e\n\u003c\/tr\u003e\n\u003ctr\u003e\n\u003ctd style=\"width: 164px;\"\u003e\u003cbr\u003e\u003c\/td\u003e\n\u003ctd style=\"width: 416px;\"\u003e120\/70 VR19 (60V)\u003c\/td\u003e\n\u003c\/tr\u003e\n\u003ctr style=\"height: 21px;\"\u003e\n\u003ctd style=\"width: 164px; height: 21px;\"\u003eREAR\u003c\/td\u003e\n\u003ctd style=\"width: 416px; height: 21px;\"\u003e150\/70 ZR17 (69W) (available April 2025)\u003c\/td\u003e\n\u003c\/tr\u003e\n\u003ctr style=\"height: 21px;\"\u003e\n\u003ctd style=\"width: 164px; height: 21px;\"\u003e\u003c\/td\u003e\n\u003ctd style=\"width: 416px; height: 21px;\"\u003e160\/60 ZR17 (69W)\u003c\/td\u003e\n\u003c\/tr\u003e\n\u003ctr style=\"height: 21px;\"\u003e\n\u003ctd style=\"width: 164px; height: 21px;\"\u003e\u003c\/td\u003e\n\u003ctd style=\"width: 416px; height: 21px;\"\u003e170\/60 ZR17 (72W)\u003c\/td\u003e\n\u003c\/tr\u003e\n\u003ctr style=\"height: 21px;\"\u003e\n\u003ctd style=\"width: 164px; height: 21px;\"\u003e\u003c\/td\u003e\n\u003ctd style=\"width: 416px; height: 21px;\"\u003e180\/55 ZR17 (73W)\u003c\/td\u003e\n\u003c\/tr\u003e\n\u003ctr style=\"height: 21px;\"\u003e\n\u003ctd style=\"width: 164px; height: 21px;\"\u003e\u003c\/td\u003e\n\u003ctd style=\"width: 416px; height: 21px;\"\u003e190\/50 ZR17 (73W)\u003c\/td\u003e\n\u003c\/tr\u003e\n\u003ctr style=\"height: 21px;\"\u003e\n\u003ctd style=\"width: 164px; height: 21px;\"\u003e\u003c\/td\u003e\n\u003ctd style=\"width: 416px; height: 21px;\"\u003e190\/55 ZR17 (75W)\u003c\/td\u003e\n\u003c\/tr\u003e\n\u003c\/tbody\u003e\n\u003c\/table\u003e\n\u003c\/div\u003e\n\u003c\/div\u003e\n\u003c\/div\u003e","published_at":"2025-03-20T11:38:52+11:00","created_at":"2025-03-20T11:00:27+11:00","vendor":"Bridgestone","type":"Road","tags":["Brand_Bridgestone","Sports Touring","Use_Road"],"price":26995,"price_min":26995,"price_max":38995,"available":true,"price_varies":true,"compare_at_price":null,"compare_at_price_min":0,"compare_at_price_max":0,"compare_at_price_varies":false,"variants":[{"id":42578729042003,"title":"120\/70 ZR17","option1":"120\/70 ZR17","option2":null,"option3":null,"sku":"8002268","requires_shipping":true,"taxable":true,"featured_image":null,"available":true,"name":"Bridgestone Battlax T33 - 120\/70 ZR17","public_title":"120\/70 ZR17","options":["120\/70 ZR17"],"price":26995,"weight":0,"compare_at_price":null,"inventory_quantity":0,"inventory_management":null,"inventory_policy":"deny","barcode":null,"requires_selling_plan":false,"selling_plan_allocations":[]},{"id":42578742968403,"title":"120\/70 ZR19","option1":"120\/70 ZR19","option2":null,"option3":null,"sku":"8002272","requires_shipping":true,"taxable":true,"featured_image":null,"available":true,"name":"Bridgestone Battlax T33 - 120\/70 ZR19","public_title":"120\/70 ZR19","options":["120\/70 ZR19"],"price":27995,"weight":0,"compare_at_price":null,"inventory_quantity":0,"inventory_management":null,"inventory_policy":"deny","barcode":"","requires_selling_plan":false,"selling_plan_allocations":[]},{"id":42578729271379,"title":"160\/60 ZR17","option1":"160\/60 ZR17","option2":null,"option3":null,"sku":"8002275","requires_shipping":true,"taxable":true,"featured_image":null,"available":true,"name":"Bridgestone Battlax T33 - 160\/60 ZR17","public_title":"160\/60 ZR17","options":["160\/60 ZR17"],"price":34995,"weight":0,"compare_at_price":null,"inventory_quantity":0,"inventory_management":null,"inventory_policy":"deny","barcode":null,"requires_selling_plan":false,"selling_plan_allocations":[]},{"id":42578729336915,"title":"170\/60 ZR17","option1":"170\/60 ZR17","option2":null,"option3":null,"sku":"8002277","requires_shipping":true,"taxable":true,"featured_image":null,"available":true,"name":"Bridgestone Battlax T33 - 170\/60 ZR17","public_title":"170\/60 ZR17","options":["170\/60 ZR17"],"price":35495,"weight":0,"compare_at_price":null,"inventory_quantity":0,"inventory_management":null,"inventory_policy":"deny","barcode":null,"requires_selling_plan":false,"selling_plan_allocations":[]},{"id":42578729402451,"title":"180\/55 ZR17","option1":"180\/55 ZR17","option2":null,"option3":null,"sku":"8002278","requires_shipping":true,"taxable":true,"featured_image":null,"available":true,"name":"Bridgestone Battlax T33 - 180\/55 ZR17","public_title":"180\/55 ZR17","options":["180\/55 ZR17"],"price":36995,"weight":0,"compare_at_price":null,"inventory_quantity":0,"inventory_management":null,"inventory_policy":"deny","barcode":null,"requires_selling_plan":false,"selling_plan_allocations":[]},{"id":42578729467987,"title":"190\/50 ZR17","option1":"190\/50 ZR17","option2":null,"option3":null,"sku":"8002279","requires_shipping":true,"taxable":true,"featured_image":null,"available":true,"name":"Bridgestone Battlax T33 - 190\/50 ZR17","public_title":"190\/50 ZR17","options":["190\/50 ZR17"],"price":38495,"weight":0,"compare_at_price":null,"inventory_quantity":0,"inventory_management":null,"inventory_policy":"deny","barcode":null,"requires_selling_plan":false,"selling_plan_allocations":[]},{"id":42578729500755,"title":"190\/55 ZR17","option1":"190\/55 ZR17","option2":null,"option3":null,"sku":"8002280","requires_shipping":true,"taxable":true,"featured_image":null,"available":true,"name":"Bridgestone Battlax T33 - 190\/55 ZR17","public_title":"190\/55 ZR17","options":["190\/55 ZR17"],"price":38995,"weight":0,"compare_at_price":null,"inventory_quantity":0,"inventory_management":null,"inventory_policy":"deny","barcode":null,"requires_selling_plan":false,"selling_plan_allocations":[]}],"images":["\/\/pablos.com.au\/cdn\/shop\/files\/T33.jpg?v=1742430810"],"featured_image":"\/\/pablos.com.au\/cdn\/shop\/files\/T33.jpg?v=1742430810","options":["Size"],"media":[{"alt":null,"id":29245509861459,"position":1,"preview_image":{"aspect_ratio":1.0,"height":225,"width":225,"src":"\/\/pablos.com.au\/cdn\/shop\/files\/T33.jpg?v=1742430810"},"aspect_ratio":1.0,"height":225,"media_type":"image","src":"\/\/pablos.com.au\/cdn\/shop\/files\/T33.jpg?v=1742430810","width":225}],"requires_selling_plan":false,"selling_plan_groups":[],"content":"\u003cdiv id=\"top-bit\"\u003e\n\u003cdiv class=\"overview-txt\"\u003e\n\u003ch2\u003eBattlax T33\u003c\/h2\u003e\n\u003cdiv style=\"text-align: left;\" class=\"txt\"\u003e\n\u003cp\u003e\u003cspan\u003eThe Battlax Sport Touring T33 is Bridgestone’s premium sport touring tyre crafted to deliver effortless performance and extended tread life for when you never want the road to end. As the next evolution of the Battlax Sport Touring T32, the T33 is engineered with responsive handling and enhanced wet and dry grip, inspiring confidence through every curve, rain or shine, so you can enjoy the journey ahead.\u003c\/span\u003e\u003c\/p\u003e\n\u003cul\u003e\n\u003cli\u003e\u003cspan\u003eDelivers up to 47% longer wear life for more ride time.\u003c\/span\u003e\u003c\/li\u003e\n\u003cli\u003e\u003cspan\u003eEnhanced compound technology delivers impressive grip on wet roads.\u003c\/span\u003e\u003c\/li\u003e\n\u003cli\u003e\u003cspan\u003eNew pattern design to combat wear degradation.\u003c\/span\u003e\u003c\/li\u003e\n\u003cli\u003e\u003cspan\u003eOptimized pattern stiffness supports precise handling, straight-line stability and improved wear.\u003c\/span\u003e\u003c\/li\u003e\n\u003c\/ul\u003e\n\u003c\/div\u003e\n\u003c\/div\u003e\n\u003cul\u003e\u003c\/ul\u003e\n\u003cul\u003e\u003c\/ul\u003e\n\u003c\/div\u003e\n\u003cdiv class=\"clear-block\"\u003e\n\u003cdiv id=\"node-3299\" class=\"tyre node\"\u003e\n\u003cdiv class=\"node-content clear-block\"\u003e\n\u003ctable width=\"100%\"\u003e\n\u003ctbody\u003e\n\u003ctr style=\"height: 21px;\"\u003e\n\u003ctd style=\"width: 164px; height: 21px;\"\u003eTYRE\u003c\/td\u003e\n\u003ctd style=\"width: 416px; height: 21px;\"\u003eSIZE\u003c\/td\u003e\n\u003c\/tr\u003e\n\u003ctr style=\"height: 21px;\"\u003e\n\u003ctd style=\"width: 164px; height: 21px;\"\u003e\u003cspan\u003eFRONT\u003c\/span\u003e\u003c\/td\u003e\n\u003ctd style=\"width: 416px; height: 21px;\"\u003e120\/70 ZR17 (58W)\u003c\/td\u003e\n\u003c\/tr\u003e\n\u003ctr style=\"height: 21px;\"\u003e\n\u003ctd style=\"width: 164px; height: 21px;\"\u003e\u003c\/td\u003e\n\u003ctd style=\"width: 416px; height: 21px;\"\u003e120\/70 ZR18 (59W) (available June 2025)\u003c\/td\u003e\n\u003c\/tr\u003e\n\u003ctr style=\"height: 21px;\"\u003e\n\u003ctd style=\"width: 164px; height: 21px;\"\u003e\u003c\/td\u003e\n\u003ctd style=\"width: 416px; height: 21px;\"\u003e110\/80 VR19 (59V) (available May 2025)\u003c\/td\u003e\n\u003c\/tr\u003e\n\u003ctr\u003e\n\u003ctd style=\"width: 164px;\"\u003e\u003cbr\u003e\u003c\/td\u003e\n\u003ctd style=\"width: 416px;\"\u003e120\/70 VR19 (60V)\u003c\/td\u003e\n\u003c\/tr\u003e\n\u003ctr style=\"height: 21px;\"\u003e\n\u003ctd style=\"width: 164px; height: 21px;\"\u003eREAR\u003c\/td\u003e\n\u003ctd style=\"width: 416px; height: 21px;\"\u003e150\/70 ZR17 (69W) (available April 2025)\u003c\/td\u003e\n\u003c\/tr\u003e\n\u003ctr style=\"height: 21px;\"\u003e\n\u003ctd style=\"width: 164px; height: 21px;\"\u003e\u003c\/td\u003e\n\u003ctd style=\"width: 416px; height: 21px;\"\u003e160\/60 ZR17 (69W)\u003c\/td\u003e\n\u003c\/tr\u003e\n\u003ctr style=\"height: 21px;\"\u003e\n\u003ctd style=\"width: 164px; height: 21px;\"\u003e\u003c\/td\u003e\n\u003ctd style=\"width: 416px; height: 21px;\"\u003e170\/60 ZR17 (72W)\u003c\/td\u003e\n\u003c\/tr\u003e\n\u003ctr style=\"height: 21px;\"\u003e\n\u003ctd style=\"width: 164px; height: 21px;\"\u003e\u003c\/td\u003e\n\u003ctd style=\"width: 416px; height: 21px;\"\u003e180\/55 ZR17 (73W)\u003c\/td\u003e\n\u003c\/tr\u003e\n\u003ctr style=\"height: 21px;\"\u003e\n\u003ctd style=\"width: 164px; height: 21px;\"\u003e\u003c\/td\u003e\n\u003ctd style=\"width: 416px; height: 21px;\"\u003e190\/50 ZR17 (73W)\u003c\/td\u003e\n\u003c\/tr\u003e\n\u003ctr style=\"height: 21px;\"\u003e\n\u003ctd style=\"width: 164px; height: 21px;\"\u003e\u003c\/td\u003e\n\u003ctd style=\"width: 416px; height: 21px;\"\u003e190\/55 ZR17 (75W)\u003c\/td\u003e\n\u003c\/tr\u003e\n\u003c\/tbody\u003e\n\u003c\/table\u003e\n\u003c\/div\u003e\n\u003c\/div\u003e\n\u003c\/div\u003e"}
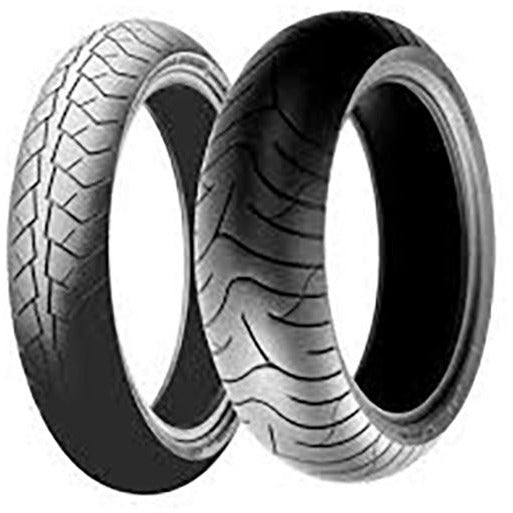
Bridgestone Battlax T33

Related Products

Bridgestone Battlax AdventureCross AX41
From $129.95

Bridgestone Battlax AdventureCross AX41 SCRAMBLER
From $179.95

Bridgestone Battlax BT-01
From $319.95
Bridgestone Battlax BT-020
From $269.95

Bridgestone Battlax BT-028
From $274.95

Bridgestone Battlax Hypersport S21
From $189.00

Bridgestone Battlax Hypersport S22
From $219.95

Bridgestone Battlax Hypersport S23
From $274.95

Bridgestone Battlax RS10
From $225.95

Bridgestone Battlax Sports Touring BT-46H
From $154.95

Bridgestone Battlax Sports Touring BT-46V
From $194.95

Bridgestone Battlax T32
From $219.95